How to Install and Use Wireshark in Ubuntu 22.04
Wireshark is a free and open source, cross-platform, GUI-based Network packet analyzer that is available for Linux, Windows, MacOS, Solaris, etc. It captures network packets in real-time & presents them in a human-readable format. It allows us to monitor the network packets up to the microscopic level. It also has a command line utility called ‘tshark‘ that performs the same functions as Wireshark but through the terminal & not through GUI.
Wireshark can be used for network troubleshooting, analyzing, software & communication protocol development & also for education purposes. Wireshark uses a library called ‘pcap‘ for capturing the network packets.
Wireshark Features
Support for a hundreds of protocols for inspection, Ability to capture packets in real-time & save them for later offline analysis, A number of filters to analyzing data, Data captured can be compressed & uncompressed on the fly, Various file formats for data analysis supported, output can also be saved to XML, CSV, plain text formats, data can be captured from several interfaces like ethernet, wifi, Bluetooth, USB, Frame relay , token rings etc.
Prerequisites
Pre Installed Ubuntu 22.04 Local User with sudo rights Internet Connectivity
Wireshark Installation Steps
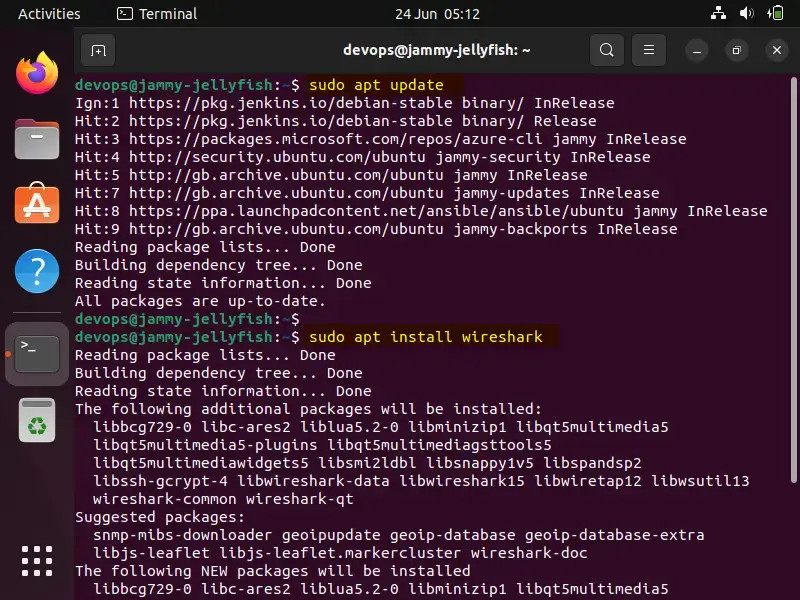
The Wireshark package is available with default Ubuntu repositories & can be simply installed using the following commands. But there might be chances that you will not get the latest version of Wireshark.
$ sudo apt update
$ sudo apt install wireshark
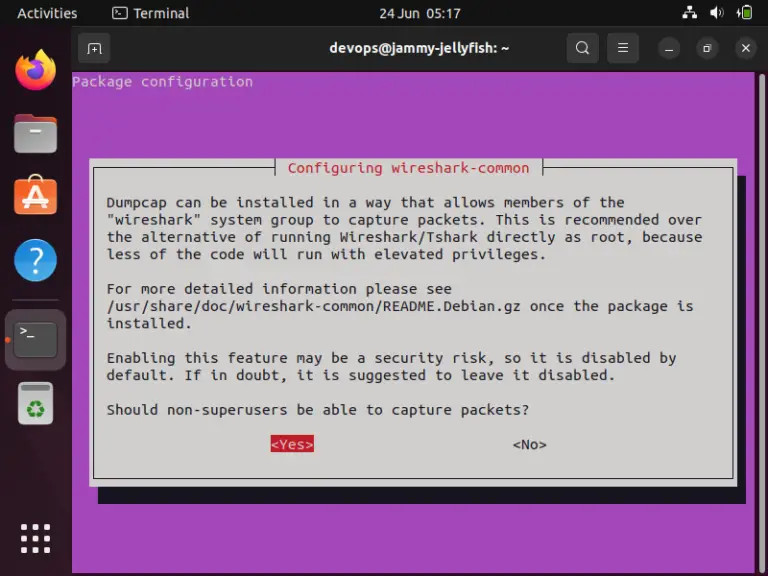
Choose Yes to allow non-superusers to capture packets using Wireshark
Post successful installation, access Wireshare UI. Search wireshark from Activities and then click on its icon.
The above confirms that your wireshark installation has been completed successfully.
In order to install the latest version of Wireshark, we must enable the official Wireshark repository using the following apt commands.
$ sudo add-apt-repository ppa:wireshark-dev/stable
$ sudo apt update
Now, Install the latest version of Wireshark, run
$ sudo apt install wireshark -y
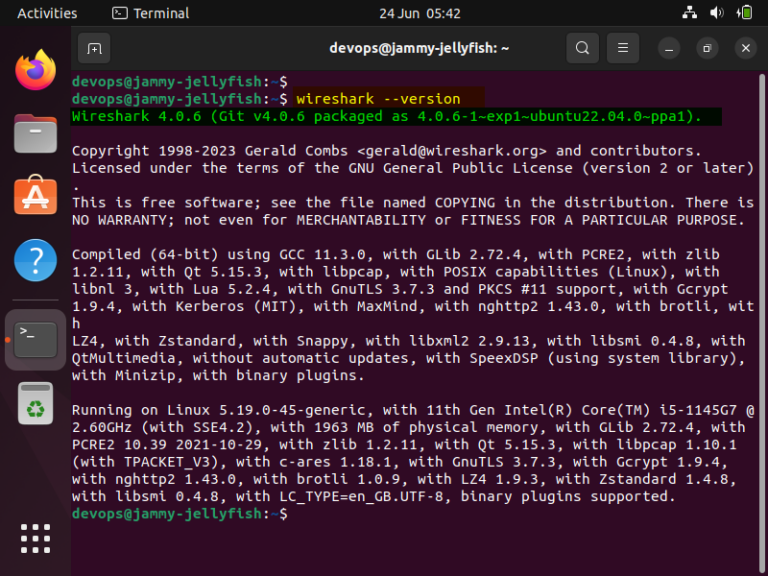
Once Wireshark is installed, verify its version,
$ wireshark --version
To allow your regular user to use and capture packets using Wireshark, run the following command
$ sudo dpkg-reconfigure wireshark-common
Choose ‘Yes’ and hit enter
Add your local user to the wireshark group using usermod command
$ sudo usermod -aG wireshark $USER
$ newgrp wireshark
To make the above changes into the effect, reboot your system once.
$ sudo reboot
Capture Packets Using Wireshark
Start the wireshark, from Activities –> Search Wireshark
Click on the Wireshark icon,
All these are the interfaces from where we can capture the network packets. Based on the interfaces you have on your system, this screen might be different for you.
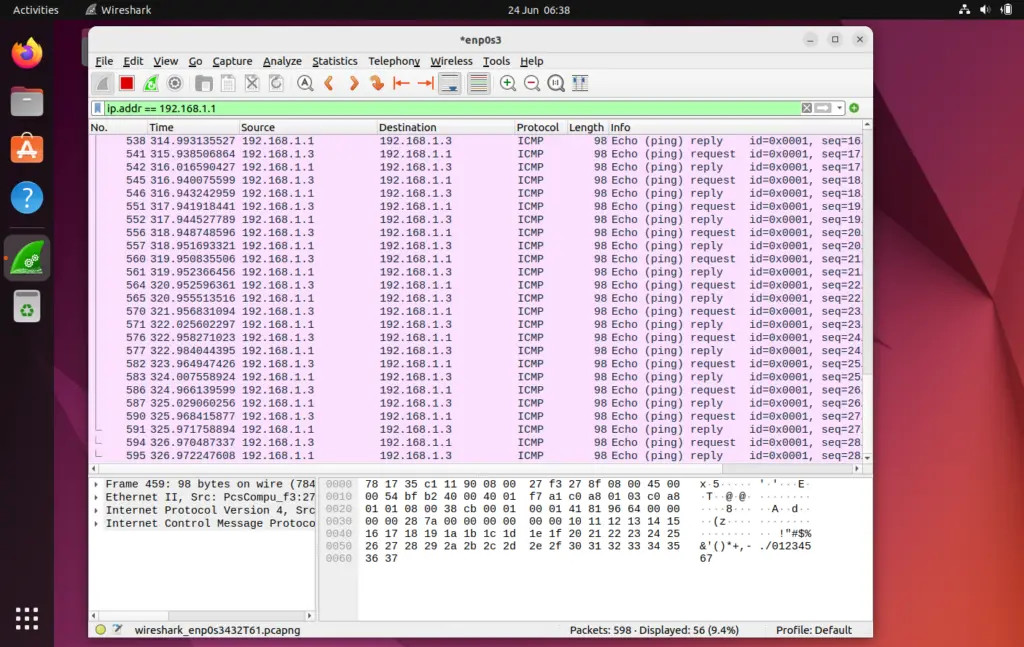
We are selecting ‘enp0s3’ for capturing the network traffic for that interface. After selecting the interface, network packets for all the devices on our network start to populate (refer to screenshot below)

The first time we see this screen we might get overwhelmed by the data that is presented in this screen & might have to think about how to sort out this data but worry not, one the best features of Wireshark is its filters.
We can sort/filter out the data based on IP address and port number, can also use source & destination filters, packet size, etc & can also combine 2 or more filters together to create more comprehensive searches. We can either write our filters in the ‘Apply a Display Filter’ tab , or we can also select one of the already created rules. To select a pre-built filter, click on the ‘flag’ icon , next to the ‘Apply a Display Filter’ tab,
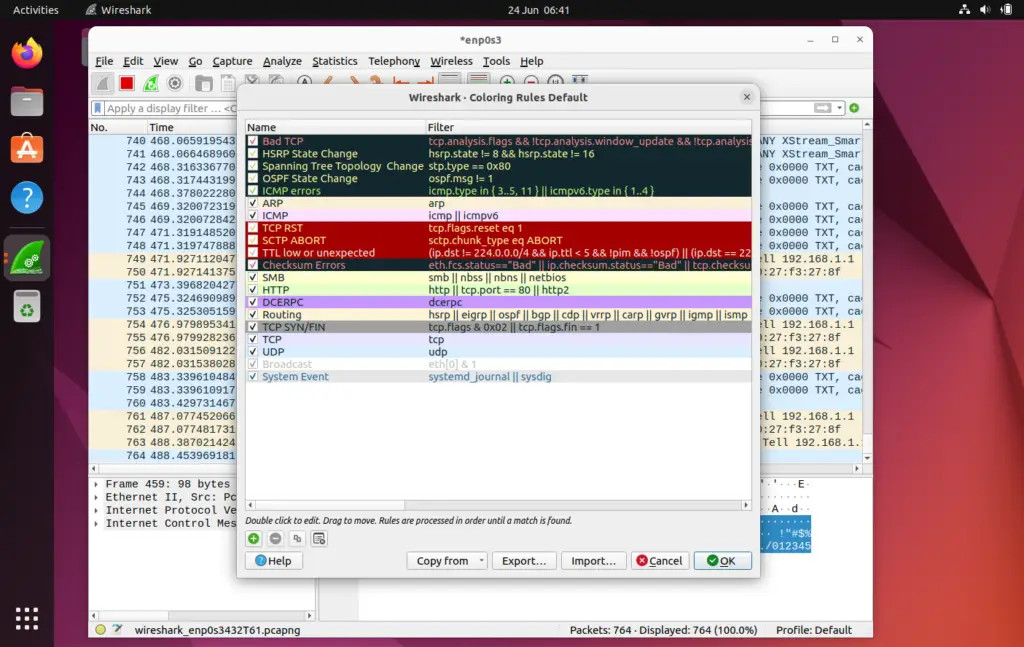
We can also filter data based on the color coding, By default, light purple is TCP traffic, light blue is UDP traffic, and black identifies packets with errors , to see what these codes mean, click View -> Coloring Rules, also we can change these codes.
After we have the results that we need, we can then click on any of the captured packets to get more details about that packet, this will show all the data about that network packet.
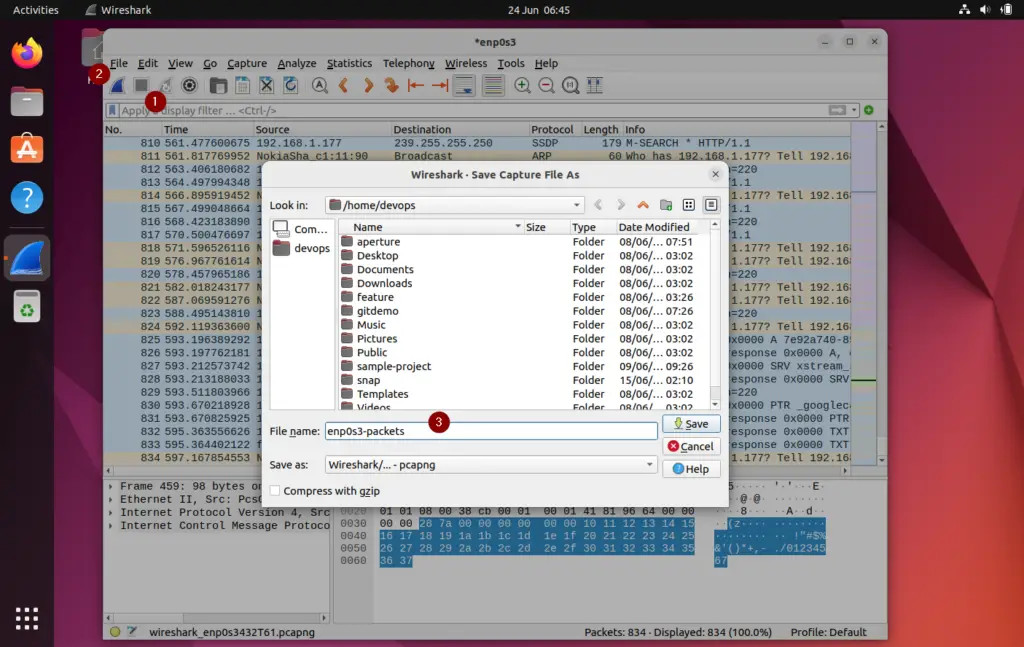
To stop capturing the packet, click on the Red button and then save the captured packets to a file.
Conclusion
Wireshark is an extremely powerful tool that takes some time to get used to & make a command over it, this post will help you get started. Please feel free to drop in your queries or suggestions in the comment box below.